While spending a couple of hours tending to my ladies, I took the opportunity to capture a few photos of the hens who were at least somewhat willing to be photographed. The hens in the coop range in age from 1-4 years old. Waiting for one of the Silkies to go broody so I can put a couple baby chicks under her, hopefully by March.
Silkies, Mille Fleur, Black StarsRaven, the 4 y/o Silkie who raises my baby chicks.This looks like a good place to lay an egg….
Understanding why the airborne components in your coop can cause respiratory disease and how to protect yourself.
Poultry dust is the airborne particulate matter that is frequently present in elevated concentrations inside your chicken coop. Occasionally, (usually) reaching a density sufficient enough that it’s visible to the naked eye. Certainly you have seen this in a ray of light while cleaning. Poultry dust refers to tiny particles that float in the air and are often found in high amounts inside the coop. This dust is considered “biologically active” because it contains microorganisms, and this is a good reason indeed for wearing a mask in your chicken coop. Poultry dust poses an elevated risk of respiratory diseases, as its fine particles can transport pathogens deep into the lungs. Inside the chicken coop, airborne components such as softwood dust, fungal spores, and harmful bacteria are continually stirred up by the scratching behavior of your chickens, and when you’re cleaning the coop. This “dust” contains various harmful components such as manure, feed, feathers, dander, and other residues from poultry. It also includes litter, biological contaminants, endotoxins from bacteria, and inorganic particles from building materials like concrete dust or insulation fibers. If you use substances like diatomaceous earth and chemical powders or sprays used for mite and lice control, lime, and other floor applications they also contribute to the composition of the dust. Dust particles also can carry viral particles, mites, molds, and more. Smaller particles are particularly dangerous as they take longer to settle, remaining in the air for an extended time and increasing the risk of inhalation. You can help protect yourself by using a disposable dust mask such as the N95. But, use what you can afford, certainly any mask is better than nothing at all.
After 15 years of raising chickens in numerous different coops, I finally went all out and had San Tan Valley Coops of Arizona build the chicken coop of my dreams.
Every chicken enthusiast understands that maintaining a chicken coop is an ongoing endeavor of constant upgrades. There’s always room for improvement, particularly when it comes to size, as coops never seem spacious enough to accommodate our flock that somehow keeps getting bigger. Concern about the safety from predators is always a concern, and aesthetically, there’s a never-ending desire to make a coop better. Owning and raising birds is only half the enjoyment; the other half lies in having a coop that is not only functional but also a comfortable place for us to do chicken chores. The transformation of this build is by San Tan Valley Coopsand without a doubt, it showcases impeccable craftsmanship. I must admit, maybe I indulged a bit this time, but I have no regrets. As the saying goes, “You get what you pay for,” and without a doubt, San Tan Valley Coops delivered pure quality.
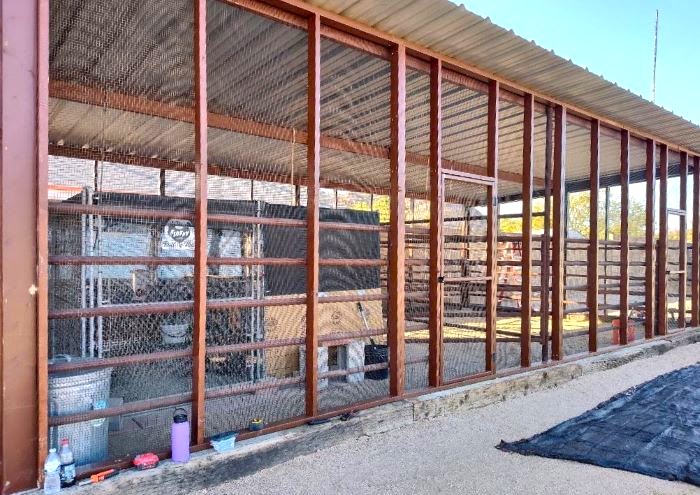
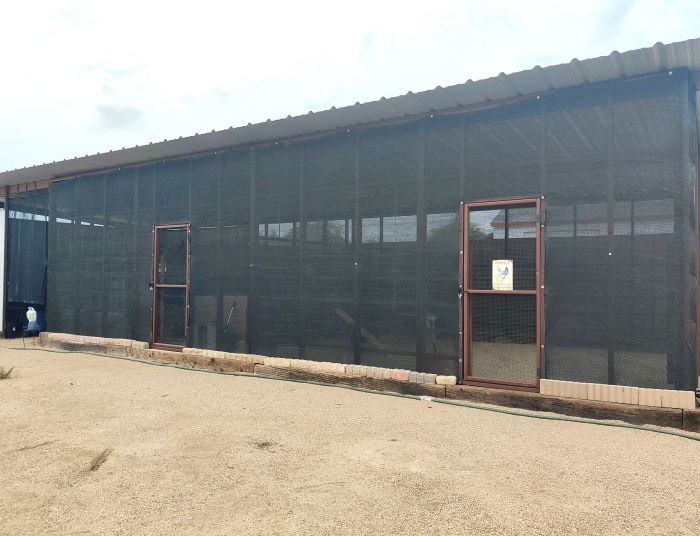
Before & After
The Completed Coop With Shade Cloth Installed for Protection from the Sun
Side View
The frame is 2×4 construction, heavy-grade 1/2-inch black hardware cloth, and two doors to make coop access easy. Door latches are high quality, and I’m confident the entire build is predator-proof. Coyotes, bobcats, and hawks are my problem here, but good luck, guys; getting into this coop is definitely not going to be worth the challenge. The building’s foundation is set on railroad ties secured in concrete and railroad spikes. I have a 10×10 interior coop for the night, where there is a little more protection from the summer monsoons and infrequent seasonal wind. It doesn’t get cold here in the winter; temps seldom drop below 40. Although it hardly ever rains here, the barn roof is waterproof and has an ample overhang. And, because I’m not crazy enough… I put cameras in the coop so I can check on my girls from the house. 🙂