We all know the risks of salmonella and how important it is to keep chickens and chicken items in their own area. Seriously, do we really practice it? There should be a designated clean area around our house where chickens, our boots, rakes, etc never end up. We shouldn’t drink our morning coffee when tending to the chickens. I’m guilty, and I’ll bet I’m not alone. So let’s take another look at how to be responsible chicken keepers, got a couple minutes to keep your family safe? An increasing number of people around the country are choosing to keep live poultry, such as chickens or ducks, as part of a greener, healthier lifestyle. While you enjoy the benefits of backyard chickens and other poultry, it is important to consider the risk of illness, especially for children, which can result from handling live poultry or anything in the area where they live and roam.Learn More
Stressful Conditions Create Unhappy Chickens and Bad Behavior
Pecking problems can begin even when chicks are still in the brooder. At this age, they start pecking the toes of other chicks. When pecking occurs in older birds, they tend to peck the backs, heads, and vent areas. Whether your birds are chicks, pullets, or mature chickens, pecking can turn into a serious matter without intervention. Pinpointing the Problem The normal behavior of chickens does include establishing a pecking order. So it’s important to watch your flock to learn the difference between normal and problematic pecking. It’s less likely to have a pecking problem if your flock is uniform in size, age, and breed. All your birds should be in good health as well; those that show signs of weakness are more apt to be a victim of aggressive behavior. When persistent pecking is observed, check your flock’s environment. Poor living conditions or inadequate nutrition can be a factor in bad behavior. Make sure all members of the flock have access to food and water, even if it means putting it in more than one place. Hens do not take kindly to a shortage of nest boxes either; place them in various areas with easy access. When there’s excessive pecking brewing in the brooder, it may be something as simple as lighting. Improper or undesirable lighting in the brooder can cause stress, If you’re using clear bulbs in the brooder, switch to red. Check the temperature in their environment, if it’s too hot, or cold, this can contribute to pecking. Adequate space is also vital, whether in the brooder or the coop. Last, but not least, check for parasites. Examine your birds, their droppings, and the coop, and treat if necessary. Pecking habits and cannibalism occur when birds are under stress and unhappy. Take a good look at the environment that has been created for them. Is it what your chickens need to live in harmony?
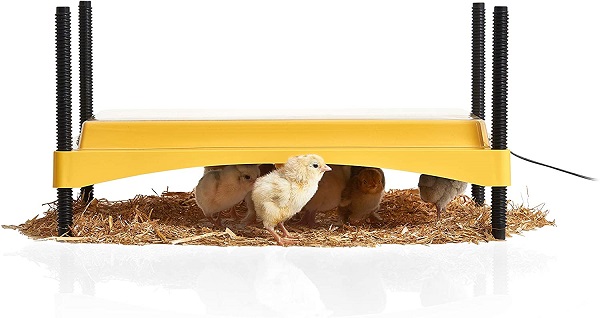
When your day-old chicks arrive from the hatchery they will need food, water, heat, light, fresh air, and space. They will arrive stressed from excess heat or cold, lack of food, and might be showing signs of dehydration. Your chicks can survive several days on the stored yolk in their body, but heat, food, and water should be the priority upon their arrival. It’s a good idea to have electrolytes on hand before you pick up your chicks. They might look a bit wilted from their travels, and this will help perk them up. I don’t usually use electrolytes for more than two days. A popular brand of electrolytes is Sav-a-Chick which is available online or at local feed stores. Old School Practices: On the day your chicks arrive you should have a draft-free box (lined with paper towels) large enough to provide a heat lamp (red bulb) at one end. Be sure to allow enough room for a cooler area so that the hatchlings can get away from the heat source if needed. A good rule of thumb is to provide a 1/2 square foot of floor space per chick. The temperature in your brooder should be 90-95 degrees for the first week, then decrease the temperature by 5 degrees each week following. You can raise or lower the lamp to help obtain that proper temperature. If you don’t need to use a heat lamp in the brooder, for the first few days, keep a night light on so the chicks can find their food and water. Today’s Heat Source Choice: Heat lamps are often hard to regulate temperatures, another choice is using a Brinsea Chick Brooder. They are safer, and you won’t be spending so much time adjusting the heat lamp. If your chicks are in a room with a temperature of around 60, radiant heat is a better choice than a heat lamp. We have learned over time to pitch the heat lamp and make the switch to a more natural heat source from a radiant heat brooder.
Radiant Heat brooder Available on Amazon
On week two, you can start using shavings for bedding (not cedar) in the brooder. You can also raise the drinker a bit to help keep the water clean. Use a drinker made for chicks to avoid the possibility of drowning. Chick starter feed is all your hatchlings will need until they are at their point of lay… which is about 5-6 months, or so. Important! Something to watch for that can put your chicks in danger is pasting up, this is simply a poopy butt. This is common in baby chicks, and if not tended to, they won’t be able to poop and can die. So keep those fuzzy butts clean by using a baby wipe, or a wet paper towel. Learn more about Pasting Up.
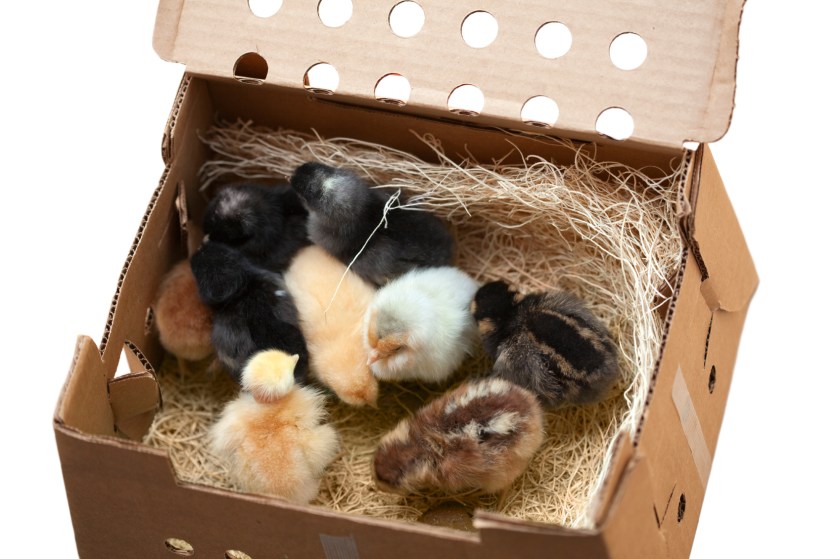
Mail order chicks will arrive to your post office in a box like this.